Miele CM 5200 Betriebsanleitung
Stöbern Sie online oder laden Sie Betriebsanleitung nach Kaffeemacher Miele CM 5200 herunter. Miele CM 5200 Operating instructions Benutzerhandbuch
- Seite / 80
- Inhaltsverzeichnis
- LESEZEICHEN
- Operating Instructions 1
- Freestanding coffee machine 1
- Contents 2
- IMPORTANT SAFETY INSTRUCTIONS 4
- Children 5
- Technical safety 5
- SAVE THESE INSTRUCTIONS 7
- AND REVIEW THEM 7
- PERIODICALLY 7
- Guide to the machine 10
- Turning on for the first time 11
- Water hardness 12
- SETTINGS 13
- WATER HARDNESS s 13
- Filling the water tank 14
- Turning the machine On / Off 16
- Pre-heating cups 17
- Canceling preparation 19
- Espresso or coffee 20
- Adding ground coffee 21
- Making coffee or espresso 22
- Specialty coffees with milk 23
- Preparing hot water 26
- Adjusting the grinder setting 27
- Amount of coffee 28
- Pre-brewing the coffee 29
- Brewing temperature 30
- Setting the serving size 31
- The SETTINGS menu 34
- Cleaning and care 45
- Descaling 58
- Energy saving mode 60
- Frequently asked questions 61
- After sales service 71
- Accessories 72
- Transport 73
- Installation instructions 75
- Electrical connection 76
- Installation 77
- Dimensions 78
- Caring for the environment 79
- M.-Nr. 09 319 110 / 00 80
Inhaltsverzeichnis
Operating InstructionsFreestanding coffee machineCM 5200To prevent accidentsand machine damageread these instructionsbeforeinstallation or use.M.-Nr.
Button illuminationWhen the drink buttons are illuminated,you are in the main menu and canprepare drinks. If drink preparation hascommenced, only the
Please read the operatinginstructions and take the time tofamiliarize yourself with the coffeemachine before using it for the firsttime.Before using f
To set the time of day^Turn the rotary selector until thecurrent hour appears in the display.Press the OK button.^Turn the rotary selector until thecu
Determining the water hardnessYou can test the water hardness withthe supplied test strips. Your localwater supplier will also be able toadvise you on
The quality of the water used plays animportant part in the overall quality ofthe coffee.The water tank should be emptiedand filled with fresh, cold t
Fill the coffee bean container withroasted espresso or coffee beans.Important: Only use roastedespresso or coffee beans in thecontainer.Anything else,
The On/Off button - (Standby) can beused to turn the coffee system on or off,if the main switch at the back of themachine is turned on.Turning onWhen
Cups should always be pre-heated toallow the flavor of espresso and othercoffee drinks to develop and beretained.The smaller the volume ofcoffee/espre
The coffee dispensers can be raised orlowered to the height of your cup. If thedispensers are closer the beverage willnot cool down as quickly and the
Preparation can be canceled whileSTOP is showing in the display.To cancel the preparation of coffee orespresso,^press the OK button.Drink preparation
IMPORTANT SAFETY INSTRUCTIONS. . . . . . . . . . . . . . . . . . . . . . . . . . . . . . . . . 4Guide to the machine . . . . . . . . . . . . . . . . .
Preparing espresso or coffeeWhen the . or / buttons are pressed,the coffee system automatically grindsthe beans to brew the coffee.SELECT TYPE OF DRIN
To make espresso or coffee usingready ground coffee, add a portion ofground coffee to the ground coffeechute.This allows you to prepare adecaffeinated
Making coffee or espressousing ground coffeeYou can now select whether you wantto dispense a coffee or an espressomade with ground coffee.If no button
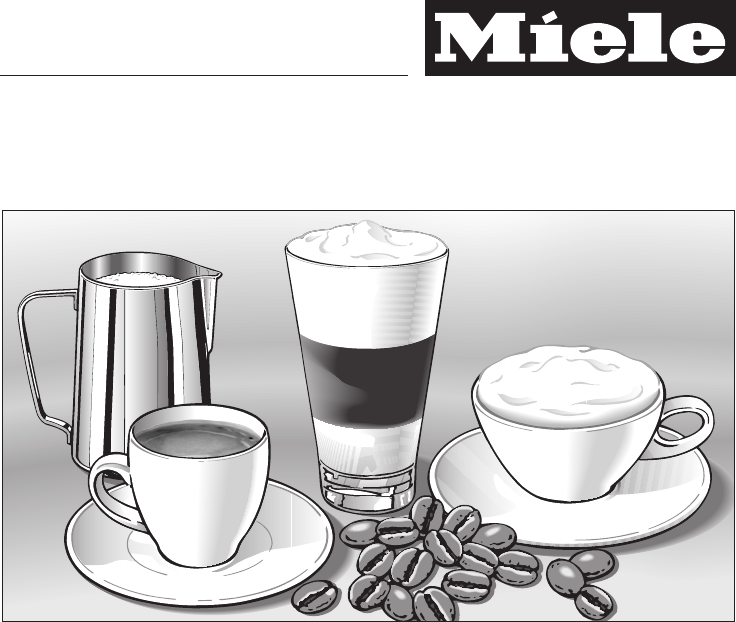
You can choose from a variety ofspecialty coffees. with milkCappuccino consists of abouttwo-thirds milk froth and one-thirdespresso.Latte macchiato co
Making specialty coffees withmilkCaution! Danger of burning andscalding from hot steam coming outof the cappuccinatore. The liquidsand steam dispensed
Specialty coffees using groundcoffeeYou can also make cappuccino, lattemacchiato or caffè latte from groundcoffee.^Fill the ground coffee chute withgr
You can make hot drinks or preheatcups using the hot water function.Caution! Danger of scalding andburns. The water dispensed is veryhot.SELECT TYPE O
You can customize the coffee machineto suit the type of coffee used.You can:–adjust the grinder setting,–change the amount of coffee,–pre-brew the fre
Amount of coffeeThe coffee machine can grind andbrew 6-14 g of coffee per cup. Thegreater the quantity, the stronger thecoffee or espresso.There are v
Pre-brewing the coffeeWhen the pre-brewing function isswitched on, the freshly ground coffeeis first moistened with a little hot water.Then the remain
The SETTINGS menu . . . . . . . . . . . . . . . . . . . . . . . . . . . . . . . . . . . . . . . . . . . . . . 34Possible setting options...
Brewing temperatureThe ideal brewing temperaturedepends on the type of coffee, andwhether espresso or coffee is beingprepared.You can set different te
The coffee machine is equipped withportion programing. You can programthe amount of water used for eachportion of espresso, coffee or hot waterto suit
Setting portion size for cappuccinoand latte macchiato^Place the desired cup under the maindispenser.^Press the H or k button for at least3 seconds.Th
Setting the serving size fromthe SETTINGS menuSELECT TYPE OF DRINK will appear inthe display.^Press the OK button until MENUappears in the display.^Tu
You can use the SETTINGS menu tocustomize the coffee machine to suityour personal requirements.Calling up the SETTINGS menu^Press the OK button for 2
Possible setting optionsThe factory setting for the currently selected option is shown in bold.Option Available settingsLanguage English, German and o
Option Available settingsInfo Total portionsCoffee drinksEspressoCoffeeCappuccinoLatte MacchiatoCaffè LatteMilk frothHot MilkHot waterNo. portions unt
LanguageSELECT TYPE OF DRINK will appear inthe display.^Press the OK button until MENUappears in the display.^Turn the rotary selector untilSETTINGS a
^Select 24 H, if you want the time tobe shown as a 24 hour clock.or^Select 12 H, if you want the time tobe shown as a 12 hour clock.^Press the OK butt
Setting the timerSELECT TYPE OF DRINK will appear inthe display.^Press the OK button until MENUappears in the display.^Turn the rotary selector untilS
When using electrical appliances basic safety precautions should always befollowed, including the following:Read all instructions before installation
Switch off afterIf none of the buttons has been pressedor no drink has been prepared, thecoffee machine will turn itself off afterone hour to save ene
Operating modesYou can operate the coffee machine inEco mode or in Comfort mode.The Eco mode is an energy-savingmode. The coffee machine will switch t
To display informationIn the menu option INFO the number ofportions prepared for each individualdrink can be displayed.You can also see whether more t
When the coffee machine is switchedoff it is locked and drinks cannot bedispensed.To deactivate the system locktemporarilyYou can deactivate the syste
Demo modeDo not activate this setting fordomestic use.The coffee machine can bedemonstrated in the showroom or atexhibitions in "demo mode".
Quick guideThe coffee system must be cleaned regularly to prevent a build-up of bacteria.Recommended frequency What do I have to do?Each time milk is
Danger of burning and scalding onhot components or by hot liquids!Always allow the coffee machine tocool down before cleaning. Notethat the water in t
Rinsing the systemThe coffee machine rinses itself when itis turned on. This means that the pipesare pre-heated with warm water readyfor you to prepar
The following will appear in the display:RINSING THE MILK SYSTEMSTART^Press the OK button.^ Place the milk tube into the left-handopening in the drip
Dismantling and cleaning the milksystemThe milk system can be cleaned in thedishwasher or by hand using hot waterand liquid dish soap.Place the indivi
ChildrenCaution! The coffee and hot waterdispensers present a danger ofburning or scalding!Children's skin is very sensitive andreacts to hot tem
Now re-assemble the cappuccinatore:^Reassemble the integratedcappuccinatore.^ Push the integrated cappuccinatoreinto the central spout. Push hard unti
Cleaning the stainless steelmilk flask(depending on the model)The milk flask should be taken apartand cleaned every day.^Clean all parts by hand only
Drip tray cover^Remove the drip tray cover from thedrip tray.^The drip tray cover can be cleaned inthe dishwasher or by hand using hotwater and liquid
Make sure that the metal contactdiscs on the drip tray are cleanedand dried properly. The discs willnot be able to detect that the driptray is full if
Bean container and groundcoffee chuteDisconnect the coffee machine fromthe power supply before cleaning.TIP Use a vacuum cleaner to removeany dry coff
^Carefully pull the brew unit out of thecoffee machine.If you cannot remove the brew uniteasily, the brew unit is not in the correctposition (see &quo
Cleaning the brew unitDepending on the natural oil content ofthe coffee used, the brew unit canbecome blocked quite quickly. Use thecleaning tablets s
ExteriorRemove any soiling promptly. Thesurfaces can become discolored orotherwise altered if soiling is notremoved right away.Make sure that no water
Limescale builds up in the coffeemachine during use. The limescalebuildup in the machine will depend onthe hardness of your local water supply.Limesca
Be sure to mix water and descalingtablets in the right proportions. It isimportant that you fill the watercontainer with enough water. Toolittle water
~Do not place the appliance on ornear a hot gas or electric burner, or in aheated oven.~The use of accessory attachmentsnot recommended by the applian
Eco-ModeWhen using Eco Mode the coffeesystem will save energy.The coffee system will switch to Ecomode if it has not been used to preparea drink in so
,Repairs should only be carried out by a qualified and trained person inaccordance with local and national safety regulations. Unauthorized repairscou
Message Possible cause and solutionFAULT - 74^Turn the machine off and then back on again.If the fault message appears in the display again,^contact M
Message Possible cause and solutionThe followingappears in thedisplay although thewater container isfull:FILL WATERCONTAINERAND PLACE INTHE MACHINEThe
Message Possible cause and solutionThe messageSYSTEMFILLING UP - STARTappears in the displayagain.The coffee machine needs descaling and/or the brewun
Unsatisfactory resultsProblem Possible cause and solutionWater is dispensedfrom the coffeedispensers whencoffee has beenselected.The ground coffee chu
Problem Possible cause and solutionThe coffee orespresso is not hotenoughThe cup has not been pre-heated.^Pre-heat the cups (see "Pre-warming cup
Unusual performance of the coffee machineProblem Possible cause and solutionWhen a drink isselected very little ornothing at all isdispensed from thec
Problem Possible cause and solutionWhen the coffeesystem is turned onusing the - button thedisplay remains dark.The main switch is turned off ("0
Problem Possible cause and solutionThe coffee machinedoes not turn on atthe programmed andactivated "Switch onat" time.The system lock is ac
~Fill the bean container only withroasted whole coffee beans. Do not fillthe bean container with coffee beanswhich have been treated or with groundcof
Problem Possible cause and solutionThe brew unit cannotbe removed,orthe brew unit cannot bereplaced in the coffeesystemThe brew unit or the brew unit
RepairsIn the event of a fault which you cannotcorrect yourself please contact theMiele Service Department by phonenumber at the back of this booklet.
The following accessories are includedwith your coffee system depending onthe model:–Measuring spoonfor ground coffee–Integrated cappuccinatoreas a sp
If the coffee machine will not be usedfor an extended period of time, e.g.vacation, or will be transported over along distance, the machine should bep
Installation instructionsInformation is subject to change. Please refer to our website to obtain the mostcurrent product specification, technical &
All electrical work should beperformed by a qualified electricianin strict accordance with nationaland local safety regulations.Installation, repairs
Danger of overheating!Ensure that there is sufficientventilation around the coffee system.Be sure the vents at the top of themachine are not coveredco
Dimensions78
Disposal of packing materialThe cardboard box and packingmaterials protect the appliance duringshipping. They have been designed tobe biodegradable an
a Cup warming surfaceb Bean container, ground coffee chuteand rotary selector to control thefineness of the ground coffeec Display and controlsd Hot w
Alteration rights reserved / 1512INFORMATION IS SUBJECT TO CHANGE. PLEASE REFER TO OUR WEBSITE TO OBTAIN THE MOSTCURRENT PRODUCT SPECIFICATIONS, TECHN
Display and controlsDrink buttonsPress these buttons to prepare thedesired drink.The symbols mean:. Espresso b/ Coffee ak Latte Macchiato gH Cappuccin
Weitere Dokumente für Kaffeemacher Miele CM 5200

Verwandte Produkte und Handbücher für Kaffeemacher Miele CM 5200
 (24 Seiten)
(131 Seiten)
(84 Seiten)
(24 Seiten)
(131 Seiten)
(84 Seiten)
 (64 Seiten)
(88 Seiten)
(84 Seiten)
(88 Seiten)
(107 Seiten)
(64 Seiten)
(88 Seiten)
(84 Seiten)
(88 Seiten)
(107 Seiten)
 (76 Seiten)
(84 Seiten)
(76 Seiten)
(76 Seiten)
(72 Seiten)
(76 Seiten)
(84 Seiten)
(76 Seiten)
(76 Seiten)
(72 Seiten)
© 2020, manymanuals.de. Alle Rechte vorbehalten. | 2.740 s |
 Manymanuals.com
 Manymanuals.de
 Manymanuals.fr
 Manymanuals.it
 Manymanuals.pl
 Manymanuals.cz
 Manymanuals.es
 Manymanuals-pt.com
Kommentare zu diesen Handbüchern